Managing Stores & Workspaces
Written By Sam from Jinnify
Last updated 23 days ago
Managing Stores & Workspaces
Summary: How to connect Amazon stores, group them into workspaces, switch context in the top bar, pause or remove stores, and read sync statuses.
Workspaces vs stores
Think of a workspace as a folder. Stores are the Amazon connections inside it.
Switching workspace only changes which stores you see. It does not create a new login or a separate subscription.
Day to day, Create, Automate, chat, and listings use the store you have selected, not every store in the workspace at once.
When you first open Jinnify
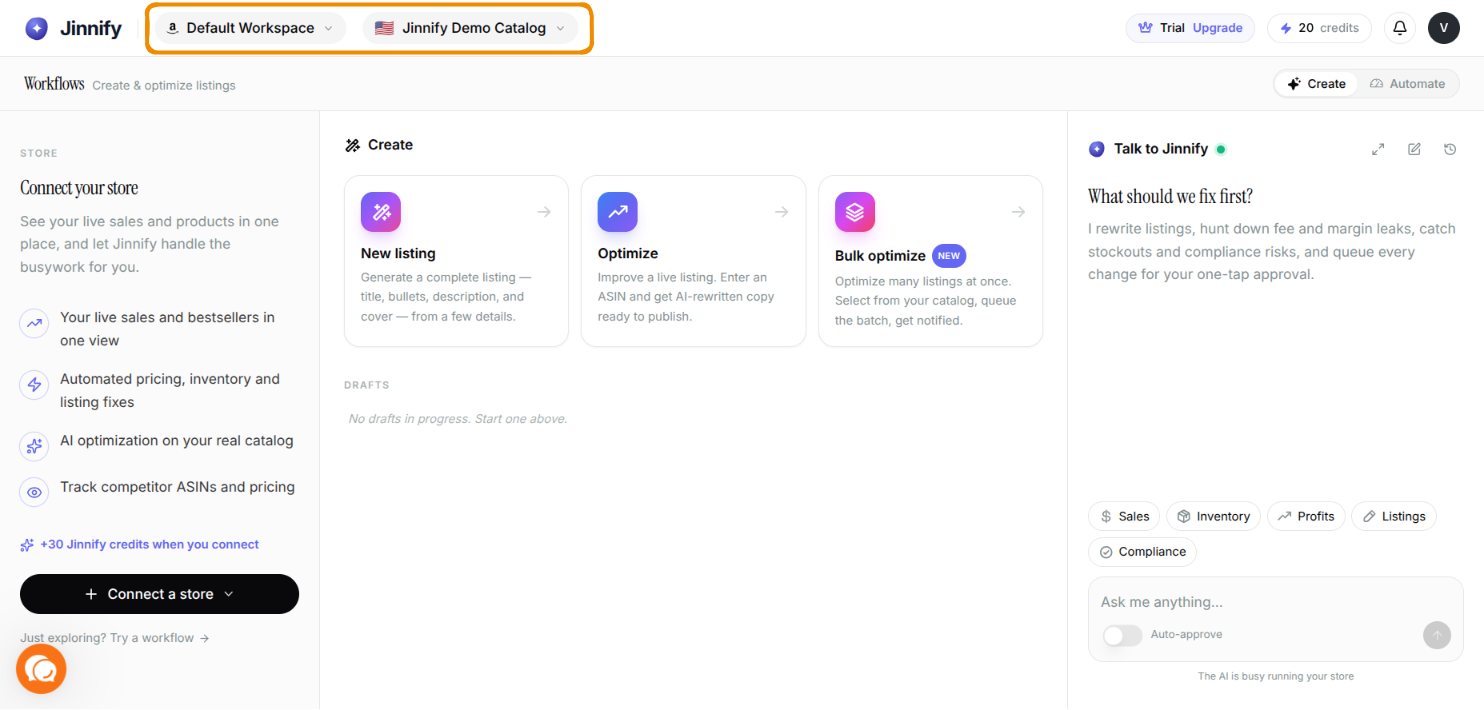
Jinnify sets you up with:
A default workspace (usually named Default Workspace)
A demo store (Jinnify Demo Catalog, badge Sandbox) so you can explore before connecting Amazon
During onboarding you may import a public storefront into the sandbox (confirm first). That can rename the sandbox and seed products for exploration. Live metrics, bulk catalog work, and publishing still need a real Amazon connection.
You can connect a real Amazon store any time. It is added to your default workspace; you can move it later. After a real store connects, Jinnify removes the demo store for you. You cannot delete the demo store by hand.
Switching workspace and store
At the top of most pages you will see two controls:
Workspace — which group you are in
Store — which Amazon connection is active
These controls are hidden on the Your stores page so you can focus on managing connections.
Change workspace
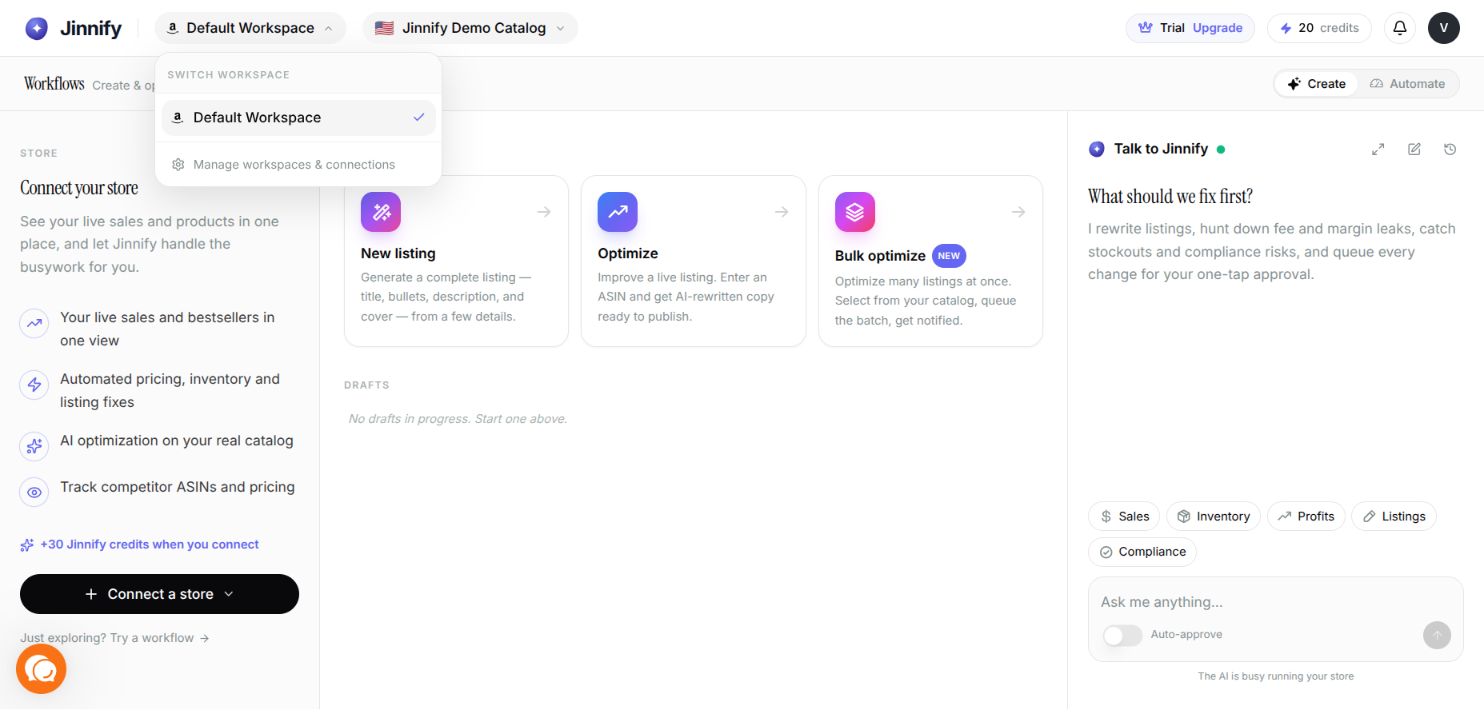
Click the workspace name at the top.
Choose another workspace under Switch workspace.
Jinnify opens the store you last used in that workspace (or the first available one).
At the bottom of the menu, Manage workspaces & connections opens Your stores.
Note: Changing workspace or store does not automatically wipe chat history. Use New chat in the chat panel when you want a clean thread for the new store. New messages use the currently selected store.
Change store
Click the store name at the top.
Pick a store from the list.
Only active stores appear here. Paused stores are hidden until you turn them back on.
Jinnify remembers your last workspace and last store per workspace for the next visit.
Default home (Create vs Automate)
After sign-in, connected sellers land on either Create or Automate based on Default home.
Account menu → Settings → Preferences.
Set Default home to Create or Automate.
You can also change it with the Create / Automate toggle on home; both use the same preference. Without a real Amazon store, you always open Create. See Getting Started for details.
Your stores page
Open it from: top bar → workspace menu → Manage workspaces & connections.
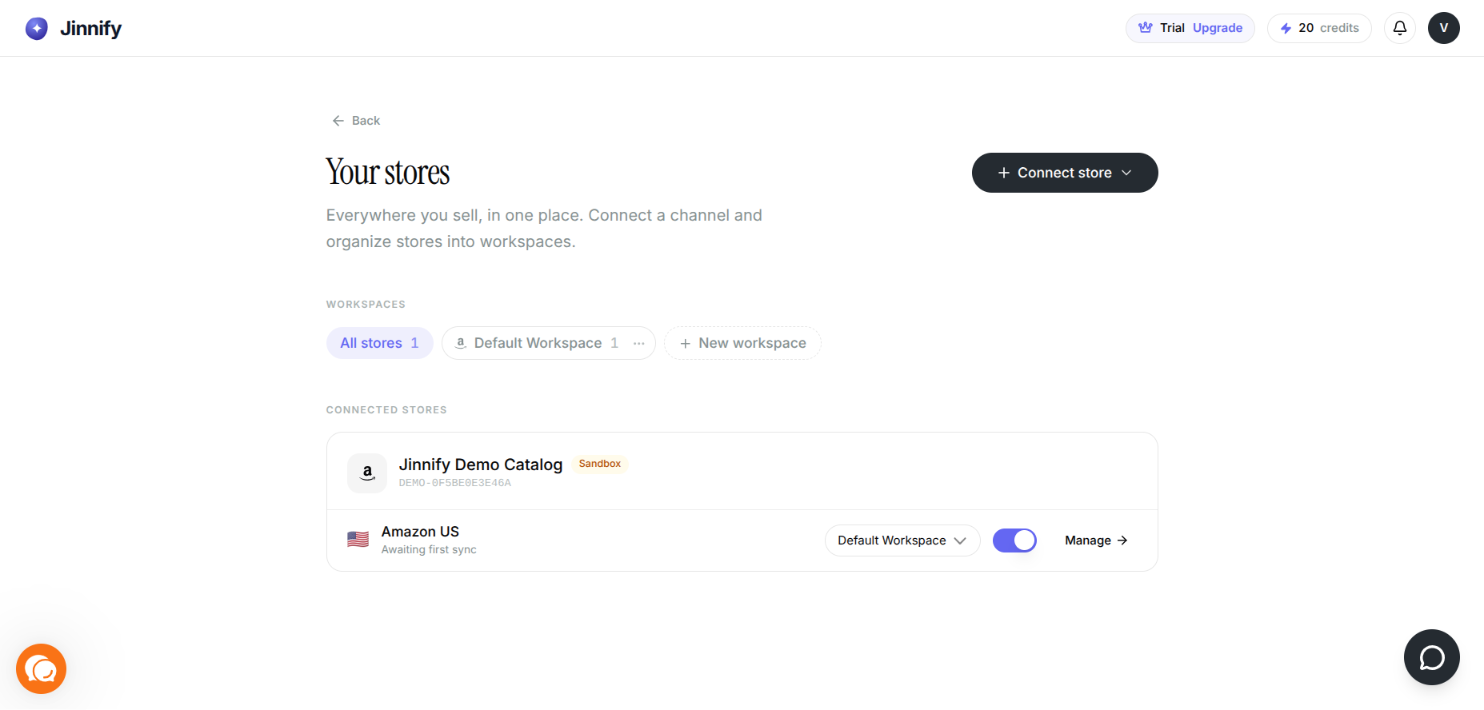
Here you can:
Connect Amazon (and see other channels marked Soon)
Create and manage workspaces
See all stores, move them between workspaces, pause them, or open Manage settings
Workspaces at the top
All stores — every connection
One button per workspace (name and store count)
+ New workspace
Click a workspace to filter the list. Click All stores to show everything again.
Store list
Stores are grouped by Amazon seller (same seller, different countries appear together).
Each row shows:
Marketplace (for example United States)
Sync status (how recently data was updated)
Which workspace it belongs to
On/off (active / paused)
Manage (store settings)
If a filter shows No stores in this workspace, assign a store with the row’s workspace dropdown, connect a new store, or switch to All stores.
Workspaces
Create a workspace
On Your stores, click + New workspace.
Enter a name (for example “Core brands” or “Client accounts”).
Click Create workspace.
Or while moving a store: open that store’s workspace dropdown → + New workspace → name it (the store is added automatically).
Rename a workspace
Click ⋯ on the workspace button.
Choose Rename.
Save.
Renaming does not move or remove stores.
Move a store
On Your stores, find the marketplace row.
Open its workspace dropdown.
Pick another workspace or + New workspace.
Delete a workspace
Click ⋯ on the workspace button.
Choose Delete and confirm.
Rules:
You cannot delete a workspace that still has stores — move them out first.
You must always keep at least one workspace.
Safe sequence: move every store out → confirm the button count is zero → delete. Deleting a workspace does not delete stores.
Stores
Pause or activate
Use the on/off switch on Your stores, or open Manage and use Active / Paused at the top.
Pausing does not disconnect Amazon. Turn it back on when you need it.
Rename a store
Click Manage.
Under Store information, edit Store name.
Click Save changes.
Seller ID and marketplace come from Amazon and cannot be edited here.
Status messages
Reconnect
Reconnect needed (list / top bar): Amazon access expired. Use Connect store → Amazon and approve again. There is no separate reconnect control on Manage for this case.
Onboarding Failed (Manage): open Manage → Reconnect store, complete Amazon approval, contact support if it still fails.
Remove a store
For a real Amazon store (not the demo):
Manage → Remove this store.
Confirm.
This disconnects the store from Jinnify and removes its synced data. You can connect again later. The demo store cannot be removed manually.
Connecting Amazon
Open Your stores, or Connect store from the store menu.
Connect store → Amazon.
Read the explainer, then Continue to Amazon.
Sign in to Seller Central and approve access.
When you return, the store appears under connected stores and lands in your default workspace unless you move it.
Multi-country sellers get one row per marketplace.
The demo store
Sample (and optional imported) data for exploration
Lives in your default workspace
Cannot be deleted from settings
Removed automatically after you connect a real Amazon store
Common tasks
Group by brand
Create a workspace per brand → assign marketplaces on Your stores → switch workspace, then store, day to day.
Add a new Amazon account
Connect store → Amazon → rename if you like → move workspace → wait until status leaves Awaiting first sync.
Close a workspace
Move all stores out → delete the empty workspace (only if another workspace remains).
Temporarily ignore a marketplace
Pause the store. No need to reconnect Amazon later.
Fully disconnect
Manage → Remove store → confirm.